Level Up Your Pi Game: Mastering Web SSH Raspberry Pi For Remote Access
Listen up, tech enthusiasts and Raspberry Pi wizards! If you're into tinkering with your Pi and want to take your skills to the next level, mastering Web SSH Raspberry Pi is a must-have trick up your sleeve. Imagine being able to control your Pi remotely from anywhere in the world using just a browser. Sounds cool, right? Well, buckle up because we're diving deep into the world of remote access with Web SSH.
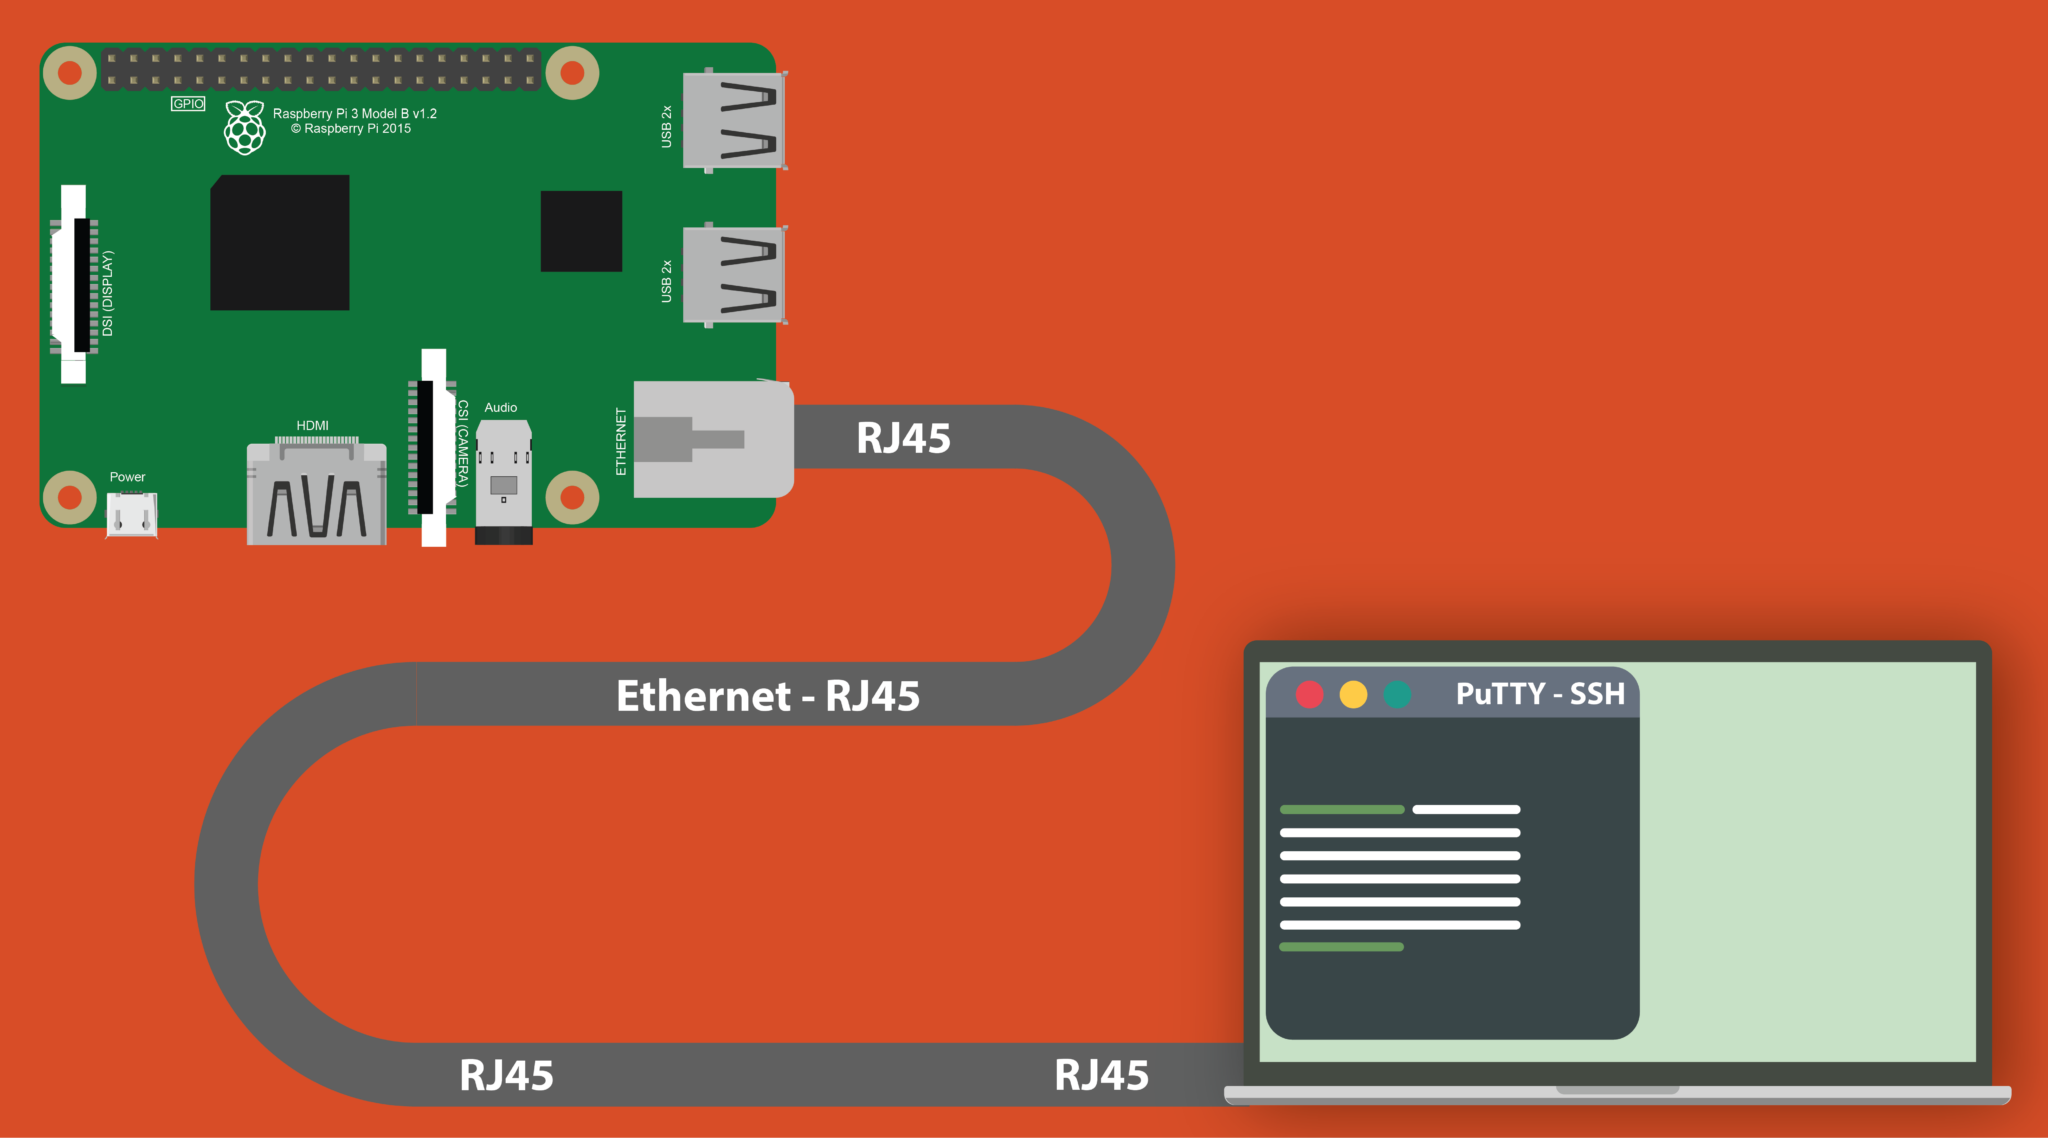
Now, let me ask you this: how often do you find yourself stuck without direct access to your Raspberry Pi? Maybe you're out and about or simply don't want to clutter your desk with extra hardware. Web SSH Raspberry Pi has got your back. This setup allows you to connect to your Pi through a web interface, eliminating the need for physical access or complicated SSH clients. It's like giving your Pi a virtual handshake from afar!
Before we dive into the nitty-gritty, let's get one thing straight. This isn't just some flashy feature that looks cool but doesn't deliver. Web SSH Raspberry Pi is a powerful tool that can transform the way you interact with your device. Whether you're a hobbyist or a professional developer, understanding how to set it up and use it effectively can save you time, effort, and a whole lot of headaches. So, let's get started and turn your Pi into a remote powerhouse!
Read also:Mia Wasikowska The Journey Of A Remarkable Actress
What Exactly Is Web SSH Raspberry Pi?
Alright, let's break it down. Web SSH Raspberry Pi is essentially a method that lets you access your Raspberry Pi remotely via a web browser using SSH (Secure Shell). Think of it as a virtual door that allows you to enter your Pi's system without needing to be physically present. The beauty of this setup is that it works seamlessly across different devices and operating systems, making it incredibly versatile.
Here's the kicker: Web SSH isn't just limited to Raspberry Pi. It's a universal protocol used for secure communication between devices. However, when combined with the Pi's lightweight and flexible nature, it becomes a game-changer for remote computing. You can manage files, run scripts, and even monitor your Pi's performance—all from the comfort of your couch or a café halfway around the world.
Now, you might be wondering, "Why not just use a traditional SSH client?" Great question! While SSH clients like PuTTY are fantastic, they require installation and configuration on each device you want to use. Web SSH, on the other hand, is browser-based, meaning you can access your Pi from any device with an internet connection and a web browser. No downloads, no hassle. Just pure, unadulterated convenience.
Why You Need Web SSH for Your Raspberry Pi
Let's face it: the world is moving towards remote everything. Whether you're managing a home automation system, running a server, or just tinkering with code, being able to access your Pi remotely is a huge advantage. Here are a few reasons why Web SSH Raspberry Pi should be at the top of your to-do list:
- Flexibility: Access your Pi from anywhere using any device with a browser.
- Security: SSH ensures that your connection is encrypted and secure, protecting your data from prying eyes.
- Convenience: No need to install additional software or carry around extra hardware.
- Cost-Effective: Web SSH is free and easy to set up, making it an excellent choice for hobbyists and professionals alike.
- Future-Proof: As technology evolves, Web SSH remains a reliable and adaptable solution for remote access.
Imagine this scenario: you're on vacation and suddenly remember that you need to update a script on your Pi. With Web SSH, you can log in from your phone, make the necessary changes, and get back to enjoying your time off. It's like having a personal assistant for your Pi, ready to handle whatever you throw at it.
Getting Started: Setting Up Web SSH on Raspberry Pi
Setting up Web SSH on your Raspberry Pi is easier than you might think. Follow these steps, and you'll be up and running in no time:
Read also:The Unbeatable Floyd Mayweather A Boxing Legend
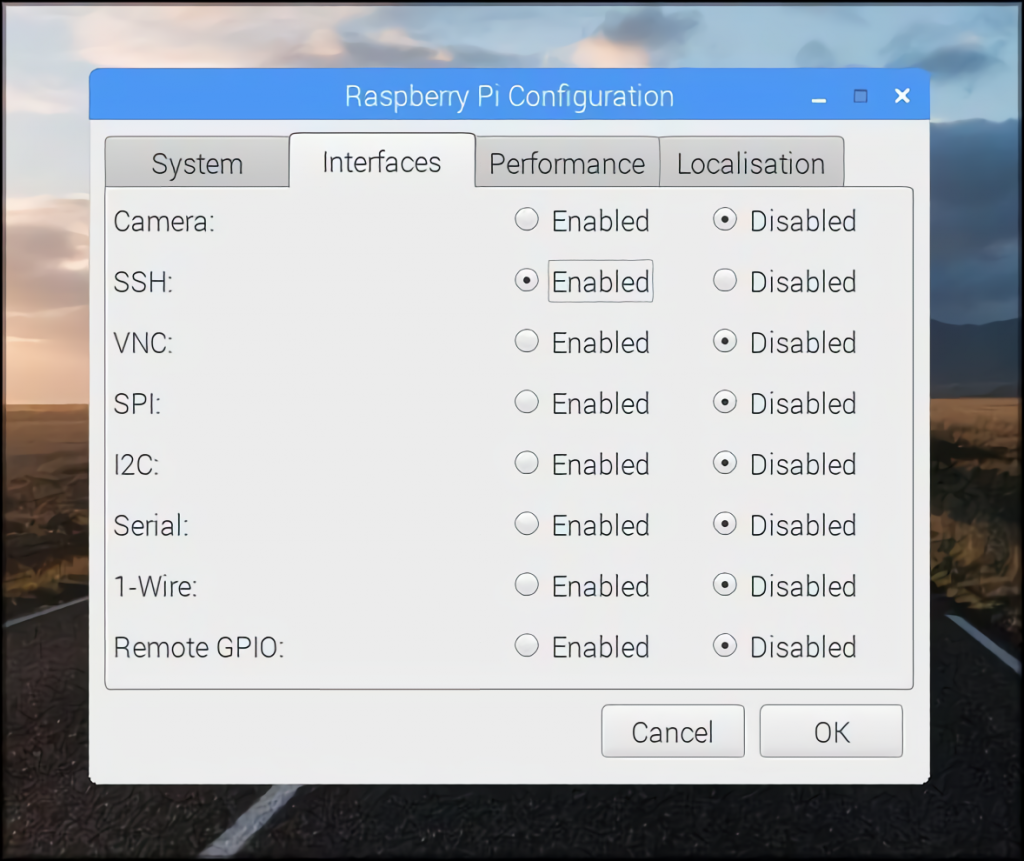
Step 1: Enable SSH on Your Raspberry Pi
First things first, you need to make sure SSH is enabled on your Pi. Here's how:
- Boot up your Raspberry Pi and log in.
- Open the terminal and type
sudo raspi-config. - Select "Interfacing Options" and navigate to "SSH".
- Choose "Yes" to enable SSH and then exit the configuration tool.
That's it! SSH is now active on your Pi, ready to accept incoming connections.
Step 2: Install Web SSH Software
Next, you'll need to install software that allows you to access your Pi via a web browser. One popular option is WebSSH2. Here's how to install it:
- Open the terminal and type
sudo apt updateto update your package list. - Install Node.js by running
sudo apt install nodejs. - Install npm (Node Package Manager) with
sudo apt install npm. - Finally, install WebSSH2 using
sudo npm install -g webssh2.
Once the installation is complete, you're ready to move on to the next step.
Configuring Your Pi for Remote Access
Now that you've installed the necessary software, it's time to configure your Pi for remote access. Here are a few tips to ensure everything runs smoothly:
- Set a Static IP Address: This ensures that your Pi's IP address doesn't change, making it easier to connect remotely.
- Enable Port Forwarding: If you're connecting from outside your local network, you'll need to set up port forwarding on your router.
- Use a Dynamic DNS Service: This allows you to access your Pi using a domain name instead of an IP address, which can change over time.
Remember, security is key. Always use strong passwords and consider enabling two-factor authentication for an extra layer of protection.
Troubleshooting Common Issues
Even with the best-laid plans, things can go wrong. Here are a few common issues you might encounter and how to fix them:
Issue 1: Unable to Connect
If you're unable to connect to your Pi, double-check the following:
- Make sure SSH is enabled on your Pi.
- Verify that your Pi's IP address is correct.
- Ensure that port forwarding is set up correctly on your router.
Issue 2: Slow Connection
A slow connection can be frustrating. Try the following:
- Restart your router and modem to refresh the connection.
- Check your internet speed and ensure it meets the requirements for remote access.
- Use a wired connection instead of Wi-Fi for better stability.
By addressing these issues, you can ensure a smooth and reliable connection to your Pi.
Advanced Tips for Power Users
If you're ready to take your Web SSH Raspberry Pi setup to the next level, here are a few advanced tips:
Tip 1: Automate Tasks with Scripts
Use Web SSH to run automated scripts that perform tasks like backups, updates, and system maintenance. This can save you a ton of time and effort in the long run.
Tip 2: Monitor System Performance
Install monitoring tools like htop or glances to keep an eye on your Pi's performance. Access these tools via Web SSH to stay informed about your system's health.
Tip 3: Secure Your Connection
Consider using SSL certificates to encrypt your Web SSH connection. This adds an extra layer of security and protects your data from potential threats.
With these advanced tips, you'll be well on your way to becoming a Web SSH Raspberry Pi master!
Security Best Practices
Security should always be a top priority when setting up remote access. Here are a few best practices to keep your Pi safe:
- Use Strong Passwords: Avoid using common or easily guessable passwords. Consider using a password manager to generate and store complex passwords.
- Enable Two-Factor Authentication: This adds an extra layer of security by requiring a second form of verification, such as a code sent to your phone.
- Keep Software Updated: Regularly update your Pi's software and firmware to patch vulnerabilities and improve security.
- Limit Access: Restrict access to your Pi to trusted devices and IP addresses to minimize the risk of unauthorized access.
By following these best practices, you can enjoy the convenience of Web SSH while keeping your Pi safe from potential threats.
Conclusion: Unlock the Full Potential of Your Raspberry Pi
And there you have it, folks! Web SSH Raspberry Pi is a powerful tool that can revolutionize the way you interact with your device. From remote access to automation and monitoring, the possibilities are endless. By following the steps outlined in this article, you can set up and secure your Web SSH connection in no time.
So, what are you waiting for? Dive in and start exploring the world of Web SSH Raspberry Pi. Don't forget to leave a comment below and let us know how it goes. And if you found this article helpful, be sure to share it with your friends and fellow Pi enthusiasts. Happy tinkering!
Table of Contents
- Level Up Your Pi Game: Mastering Web SSH Raspberry Pi for Remote Access
- What Exactly Is Web SSH Raspberry Pi?
- Why You Need Web SSH for Your Raspberry Pi
- Getting Started: Setting Up Web SSH on Raspberry Pi
- Configuring Your Pi for Remote Access
- Troubleshooting Common Issues
- Advanced Tips for Power Users
- Security Best Practices
- Conclusion: Unlock the Full Potential of Your Raspberry Pi
Article Recommendations